A crop party is a modern quilting bee. A group of friends gather to have girl friend time, sharing joys and sorrows while preserving memories and creating a special keepsake.
Showing posts with label Ink smooshing. Show all posts

Sunday, September 7, 2025

Colorful Leaves


For this card I wanted bright Fall colors which is not a palette I typically use, so there wasn't going to be a suitable background in my stash.  One custom background coming up.  I started by ink smooshing Festive Berries, Abandoned Coral, and Wild Honey Distress Oxide inks on Epson premium glossy photo paper which is thicker and sturdier than most photo papers.  The directions I have read on this technique say to apply Distress Glaze to reveal vibrant colors.  I have found that rubbing hard with a dry microfiber cloth will remove the oxidation without leaving the background slightly tacky to the touch.  I cut the top layers of the leaves using Altenew's Leaf Mix die set and laid them on the background to find the optimal spots to cut the bottom layers.


The "foil" paper is holographic paper in grapefruit I ordered from Stampin' Up years ago.  I grounded the arrangement with a piece cut using Altenew's Linear Crossroads die.  The sentiment is from Taylored Expressions Simple Strips line.

I plan to enter this card in the Sisterhood of Crafters Encouragement, Time Out Challenges Friendship/Encouragement, Support,  Four Seasons Fall Season September, A Place to Start Anything Goes, and Die Cut Divas Anything Goes challenges.  Thank you for stopping by!  Until next time, Hansi


Friday, August 22, 2025

Sending Warm Wishes for a Speedy Recovery


 I bought this Hero Arts stamp pre=pandemic because it made me think of my teenage years, yet I have only used it once and that was a couple years ago.  The Neglected Stuff  and Shopping Our Stash Hot Hot Hot challenges motivated me to use this poor neglected stamp lingering in my stash.  Of course the first step was to go through my stash of backgrounds to see if I had anything that would work.  This one goes back to when Distressed Oxide inks were introduced and a friend brought some tags over to play with my new inks.  For this one I ink smooshed Worn Lipstick, Wild Honey, and Broken China.  To add some texture to this old background I random stamped Lavinia's Sacred Spells text stamp in second generation and then, for a focal point stamped the sun using Ground Espresso Distress Oxide.  The sentiment comes from Stampin' Up's Desert Details set.  I don't use sparkles that often anymore, and when I do, I usually use clear ones.  For this card I went through my stash of embellishments and found these tiny, 2mm, black sparkles from Close to My heart that were retired years ago.   I also plan to enter this in the A Place to Start with an optional twist of Summer Things Challenge.

I am sending this to a friend who is rehabbing after knee replacement surgery.  Thank you for stopping by!  Until next time, Hansi


Friday, August 15, 2025

Happy Hawaii Day


Colorful Options is celebrating Hawaii Day with a bonus mid month 1 week challenge using this color palette:


My first thought was a lotus or other tropical flower with blue, cool pink and aqua.  This provided the perfect use for my recently acquired Leaf Mix Die set from Altenew which I couldn't wait to play with.  I used this sample card from their website as inspiration but, when I tried to link it I found that the card no longer shows on their website, so I linked to the pin on my Pinterest.

First I needed a background.  I sprayed Snow Flurries, Shiny Bauble, and Fortune Teller Distress mica sprays and Dylusions White Linen mica spray on my craft mat, with no water, and smooshed a piece of water color paper in it multiple times until I was happy with the result.  Once it was dry I used the Sacred Spells stamp from Lavinia, curly corner stamp from Inkadinkado , and a cross hatch stamp from Stampin' Up's Timeless Textures set to stamp randomly with Hickory Smoke archival ink.  Lastly I gilded the edges of the panel by pressing it perpendicularly into a Versamark ink pad and Ranger super fine silver embossing powder and melting it.  All that mica means that when you tip the card in the light it really sparkles as you can see in the second photo.

I used my new Leaf Mix die set to cut the petal bases in white, top detail layers in silver foil, and the stamen and "leaf" pad in white paper that I ink blended with Seedless Preserves Distress ink.  After putting everything together on a card base I finished it off with a clear sparkle.  You may notice there is no sentiment.  I am working on building a stash of cards ready to go that I can put an appropriate sentiment on for whatever occasion I need a card for.  This one will probably have one embossed in silver on a white strip or one embossed in white on a black strip  placed below the lotus.   Because I am preserving the ability to use this card for any occasion I am entering it in the Addicted to Stamps and More Any Occasion challenge.

I am also entering this in the Beautiful Blossoms Anything Floral Goes and A Place to Start Optional Twist Summer Things Challenges.  Thank you for stopping by!  Until next time, Hansi


Thursday, August 14, 2025

Abigayil and Her Kittens


 This card was inspired by my all time favorite children's book, Abigayil, The Story of the Cat in the Manger, written by Rouben Mamoulian and illustrated by Marshall Goodman.  It has lots of text and beautiful watercolor and charcoal illustrations.  The story, told in the voice of Abigayil, a cynical streetwise cat who lives with her kittens in a stable in Bethlehem, is her testimony about the night Jesus was born.  Her paw was broken that morning when boys threw a rock at her while she was foraging food and now seems to be infected.  She is worried about being able to provide for her kittens and the possibility of not surviving her injury.  A woman gives birth while spending the night in her stable, and she hears the parents call him Jesus.  She is puzzled by the visitors that come to worship him and the fact that she feels his love and finds herself unable to attack the mice who are watching from their holes.  During the night a cold breeze begins to  blow through the cracks in the door, and as a mother herself, she is concerned about the baby, so despite her pain, she leaves her hiding spot and manages to get into the manger where she stretches out along side him to warm him with her body.  As dawn approaches Mary stirs, so she leaves Jesus and goes outside and sees a new star in the sky.  Abigayil is so filled with joy she does a high twisty jump before racing around the barnyard and fields.  Then she remembers her paw and stops in horror, sure that she has done irreparable, possibly fatal harm to herself, but when she checks her paw she finds it completely healed.  Come to think of it, the pain began to leave as soon as she touched Jesus.  Recognizing this as a miracle, she goes back to the manger, kneels at his feet and thanks him for healing her and showing her that love needs no reason.  She ends her testimony saying that Jesus is no ordinary baby.  He is a prescious gift of love and light to the world who will be a blessing to all.  

Now about the card:  I started by ink Smooshing Balmy Night Shimmer spray and plain water on watercolor paper and allowing it to dry naturally between layers until is liked how it looked.  Like with Brushos, the pigments broke into their component revealing other colors.  Next I used the Sacred Spells stamp from Lavinia and second generation to stamp along the sides.  I used the Star of Wonder die from Memory Box for the star, Cat D-Lites die from Spellbinders for the Mama cat, and Cat Set die from Impressions Obsession for the kittens.  After laying out the die cuts to check their position,  I used the Sparkle stencil from Tim Holtz and transparent matte texture paste for the smaller stars   I gilded the edges of the panel by pressing the edges a Versamark ink pad and then fine silver embossing powder and melting it with my heat tool.

I plan to enter this in the Christmas Crafts All Year 'Round "Oh Holy Night," Mix It Up "Mixed Media," Cut it Up  "Add a Sentiment" and Peace on Earth "Anything Goes"  challenges.

Thank you for stopping by!  Until next time, Hansi


Wednesday, July 16, 2025

A Crazy Cat Lady Can Use Any Cat Die or Stamp on a Christmas Card


Every January I promise myself I will play the Christmas challenge blogs and make at least one  Christmas card a week to avoid the December card making blitz, so that maybe, just maybe, I can actually get them sent out before Christmas.  Alas, I always get distracted with making birthday, sympathy, encouragement, thank you, friendship, and you name it cards.  Seeing the Christmas in July theme on the Cut It Up and CAS on Friday challenges gave me the kick I needed to get started.  I checked the ABC Christmas challenge for this month and saw one of the letters is "N" for "non-Christmas stash."  As a proud crazy cat lady I can work a cat into any kind of card.  I still had the Cat Collage die from Poppy Stamps out after making this birthday card for my brother, so why not use it for a Christmas card?  The Peace on Earth Christmas challenge has a lovely mood board, so I went through my background stash and found one to pick up the blues.


When I am playing with ink or a technique, I will make lots of backgrounds and figure out what to do with them later.   This means I don't always remember exactly what I did on a particular one when I get around to using it.   On this one I ink smooshed with, I think, Dylusions Balmy Night shimmer and Tim Holtz Winter Frost mica sprays.  It is bluer than it looks in the photo.  I cut a piece of it slightly larger than the square I cut the cat from and, to pick up the silver in the above photo, swiped the edges with silver metallic ink from Color Box.  I cut the star from gold foil using a die from Memory Box.  I used gold embossing powder and a sentiment from the Stampin' Up set, Star of Light, on the front and a sentiment from Close to My Heart inside.  It says "A silent night, a star above, a blessed gift of hope and love."  Now I have one Christmas card for 2025!

Thank you for stopping by!  Until next time, Hansi


Tuesday, July 8, 2025

Birthday Glimmer Kitty


"Tis the season for birthdays!  Between family and friends I need quite a few this month.  I made this one for my brother, a crazy cat dad who likes to garden, following this sketch from Just Add Ink.


When I sit down to play with inks I will make a mess of backgrounds and figure out what to do with them later.  Sometimes I only use part of one and keep the leftover scrap for something else.  The background behind the cat was from a leftover bit made by smooshing Hero Arts Glimmer Inks in red, copper, and bronze on watercolor paper.  As you can see by the second image they really do shine when you tip them to the light!  The cat was cut using the Cat Collage die from Poppy Stamps and the vegetation with a die from Altenew's Leaf Mix die set.  I gilded the edges by holding the paper vertically and pressing the edges into a versamark pad and then gold embossing powder.  I stamped the sentiment with one from the So Many Sentiments set by Gina K Designs and embossed it as well.

I am also entering this in the Critter Crazy Special Birthday Bash Milestone challenge celebrating their 100th challenge and the Show Us Your Pussycats anything goes challenge.

Thank you for stopping by!  Until next time, Hansi and 


Sunday, January 28, 2024

Happy Birthday in Rainbow Colors


Happy Birthday to my not so little brother!  I started with the AAA Birthday prompt to use rainbow colors.   I smooshed Broken China, Wild Honey, and Worn Lipstick Distress Inks on different sized acrylic blocks, spritzed them with water, and one by one smooshed them onto watercolor paper.  I let each one sit for a bit to allow the color to seep into the paper.  Now what?  A few years ago I saw this card on Darlene Pavlick's blog and was inspired to buy the Oriental Screen die from Tutti and to fill in some of the openings with the negative pieces to create interest.  It has become my favorite background die.  I cut one from black and one from copper paper saving the leftovers for another card.  I used a CZ Design die to cut the sentiment once from copper paper and twice from black to stack.  I then cut the shadow from black.  I have to warn you that the shadow die cuts the openings in the b, d, and p's which on a busy background is distracting.  Because I used Hero Arts Color Hues Premium Pitch Black cardstock which is thick, completely matte, and has a black core, I could pop those cut out pieces back in without it being obvious.  You have to know what you are looking for to see the edges.  There was also, despite careful placement, an issue with black lines from the background cutting through the spaces between r and the t, and h and the b which looked klutzy and, again, distracting.  A pair manicuring scissors took care of that.  All that was left to do was attach the finished panel to a card base and stamp a sentiment inside.

In addition to the AAA Birthday Rainbow or Rainbow Colors, I am entering this card in the Seize the Birthday Anything Goes, and Creative Crafty Uncles Happy Birthday challenges.  You can visit these blogs to see more birthday cards to inspire you and maybe enter.  All three will be active for a few or more days.

Thank you for stopping by!  Until next time, Hansi


Thursday, March 2, 2023

Happy Birthday in Green and Gold


I made this card for the Colors Hues "Green and Gold," AAA Cards "Circles," Seize the Birthday "Anything Goes," Happy Little Stampers "Anything Goes Watercolor," and Die Cut Divas "Anything Goes," challenges.   For the background I sprinkled Lindy's Magicals on a craft sheet, sprayed them with water, and then ink smooshed on watercolor paper.  Once the paper was covered, I sprinkled a little more powder on and misted again.  One of the cool things about Magicals is that the shimmer is not always the same color as the pigment.   The cover die is Circle of Leaves by Simon Says Stamp.  I heat embossed a sentiment from an old Close to My Heart set, Just to Say, and popped it up with foam tape. 

Thank you for stopping by!  Until next time, Hansi


Sunday, February 26, 2023

Warm Desert Rays


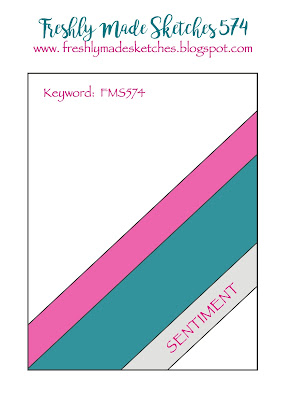
One of my aspirations for the year is to stop collecting and start using the crafting supplies that I just had to have.  None of y'all have that problem do you, lol?  First up is this stamp from Hero Arts, issued to celebrate their 45th year in business in 2019, which I combined with this Freshly Made Sketch. 


I wanted a sun washed desert feel, so I searched through my stash and found a background created using Cape Cod Coral and Clam Bake Beige from the Lindy's Magicals' Nantucket Pearls set on watercolor paper which I trimmed down to 4 x 5.25 inches.  To create interest I inked the Sacred Spells stamp from Lavinia with Fired Brick Distress Oxide ink and used second generation stamping on the upper left and lower right sides.  I did the same thing using a stamp from Stampin' Up's All Adorned and Festive Berries ink in the lower right corner.  To complete the background I inked around the edges with Abandoned Coral using a small blending brush.

After stamping the sun in Ground Espresso, I used stamps from Stampin' Up's Desert Details set, my MISTI, and Salvaged Patina and Evergreen Bough inks to put down a base for the stripes.  I then randomly dabbed Evergreen Bough and Ground Espresso on the upper stamp and Rustic Wilderness and Ground Espresso on the lower stamp and stamped again to give them a distressed weathered look.  I stamped the sentiment using one from the same set in Ground Espresso.  To add dimension I cut the trimmings from the original background to make some narrow stripes.  I finished the panel with some clear acrylic drops I had on hand and popped it up on a card base with two extra panels of cardstock.

I love the seventies vibe of the stamp and the warm sun washed look of the finished.  Thank you for stopping by!  Until next time, Hansi


Thursday, January 13, 2022

A is For Anything Christmas, S is for Snowflake, Sparkle, and Spray


I have some cardmaking goals for this year:

1. Use more of my stash and old supplies rather than just "collect" them.
2. Make at least four Christmas cards a month to avoid the December crush.
3. Learn how to use and experiment with my gel press.

This card furthers two out of three.  The current theme for Shopping Our Stash is Something That Starts with S and the theme for the ABC Christmas Challenge is A is for Anything Christmas and B is for Baubles, hence the title of this post.  

I have a never ending stash of backgrounds because I can never make just one when I get going.  This background is part of a play session with sprays in which I used mostly 9x12 sheets of bristol paper and watercolor paper.  For this particular one I sprayed water and then Bubble Gum Pink Shimmer, Periwinkle Blue, and Vibrant Turquoise Dylusions inks on bristol paper and then smooshed a second sheet flat on it.  When I picked up the top sheet there was still a lot of ink pooling on the bottom sheet, so rather then blot it up with a paper towel I grabbed the first sheet of cardstock I could lay my hands on, Sea Glass from Close to my Heart, and smooshed it on in different spots until I had blotted up the pools of ink.

I used an old Hero Arts Cut Out Christmas Fancy die to cut the top of 4.25 x 4.50 piece which left me with a beautiful, blue and turquoise script Christmas die cut that I could use somewhere else.  Once I attached the panel to a white card base I didn't really like the look of the white showing through the opening so I used the same die to cut the top of a white panel the same size as the first to have a white Christmas die cut to inlay in the opening to give the card a more finished look.   I finished the card off with a silver foil snowflake cut using an old Close to My Heart die, a sparkle, and a strip of silver foil.

If you are keeping track, I had a white twin of the blue and turquoise panel and that blue/turquoise Christmas die cut which I couldn't let go to waste, so I made a second card:


I just love a two for one, don't you?  I also plan to enter this card in the Holly and Ivy Christmas Anything Christmas Goes challenge.  Thank you for stopping by!  Until next time, Hansi