A crop party is a modern quilting bee. A group of friends gather to have girl friend time, sharing joys and sorrows while preserving memories and creating a special keepsake.
Monday, September 28, 2026
Reused Paper Towel
Tuesday, July 8, 2025
Happy Birthday Butterfly
I love this stamp, Indra, from Lavinia Stamps. I have had it and used it for about four years but never posted a card with it. Maybe it's because, although I make plenty of cards, I have often not had the time to photograph them and write a post. I am going to try to be more regular in posting. I saw that the Seize the Birthday challenge topping this cycle was use a silhouette, so I thought I would make a card featuring Indra and actually post it. I am getting this in just under the wire.
I started with watercolor paper and sprayed with water, Distress sprays and lots more water, so the colors really ran and dried it with my heat tool. Then I flicked on water, n mostly large drops, tilted the panel so they would run a bit, and then let it dry naturally which meant the ink that pooled at the edges of the drops dried leaving darker rings around them. Next I used a swirly corner stamp from Inkadinkadoo and the Sacred Spells script stamp from Lavinia without using blocks to randomly stamp bits and pieces providing more texture. I stamped Indra using black archival ink on the panel and on a piece of scrap paper to cut out a mask to protect her while I spattered white Dina Wakley Gloss spray around her. Lastly I inked the edges with black Versafine ink. Now for the sentiment. I planned on using sentiment strips from Taylored Expressions, but the card seemed too dark and needed contrast, so I ended up using a die from Gina K Designs which I cut three times and stacked. The "happy" is a piece of one of those sentiment strips. The larger die cut added the balance and brightness the card needed.
I am also entering this card in the Critter Crazy Birthday Bash, which is celebrating their 100th challenge, and Retro Rubber Stamps challenges to make a birthday card.
Thank you for stopping by! Until next time, Hansi
Sunday, January 22, 2023
Another Trip Around the Sun for My Baby Girl
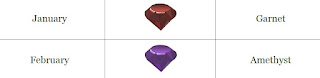
Another trip around the sun for my baby girl! Birthstone Challenges is a new challenge that runs in six week cycles beginning the first of of each odd numbered month and ending the 15th of even numbered months. For each challenge we are asked to create any project featuring the birthstone colors of the challenge period which for January and February would be garnet and amethyst meaning red and/or purple. You may use one or both colors and include other colors, but the birthstone colors must be dominant. Katherine's favorite color is purple. The optional theme for the Seize the Birthday challenge is Things With Wings and she has always loved butterflies. This shouldn't be difficult! Here is what I came up with.
I used an old layering die, Butterfly Beauty from the Beauty Abounds bundle by Stampin' Up, to cut the bottom layer from glossy white paper and the top from silver shimmer paper. I backed the butterflies with some old patterned paper which is primarily shades of purple with a bit of blue mottled together. The background is the scrap left after using the dies on white paper that I then splattered with a violet Wink of Stella brush and fitted around the butterflies. I finished it off with a popped up sentiment and sparkles.
It is hard to see how shiny this card is when photographed inside with a bounce flash, so I used my phone to take this shot outside in an attempt to capture it without a direct flash which would white out everything.
Please consider checking out and maybe entering the current Seize the Birthday challenge which runs until January 24 at 9:00 a.m. and the inaugural Birthstone Challenge which ends February !5 at 4:00 p.m. MT. Thank you for stopping by! Until next time, Hansi
Friday, June 18, 2021
Rainbow Butterflies
I always have a stash of backgrounds ready to use, some like this one, feature ink blending. Many people like blending with Distress Oxide inks because they are not quick to dry which makes getting a smooth blend easier, and being opaque, you can cover mistakes. I prefer regular Distress inks because the colors are more intense and I like how one color seems to glow through the other. Unfortunately that means sometimes my transitions are blotchy or not as smooth as I would like. Then there is the dreaded unintended ink "embellishment" which seems to happen when I have a lovely blend going:
With Oxide inks I could let it dry and then go over that section to cover it. With Distress there is no getting away from it. This background went into my backgrounds that will need special consideration to use. Often such backgrounds are cut into strips or die cuts or are used to back window die cuts that only reveal the parts I like as with this card set.
A few days ago I finally got around to using a layered butterfly die set from Stampin' Up and had some lovely negative space leftovers that were worth saving. I wanted to enter the Use Your Stuff Rainbow challenge in honor of Pride Month and knew I had a few rainbow backgrounds including this "needs special consideration" one. It just so happened that the butterflies were in just the right place to hide the ink blot. I cut only the top butterfly layer to allow more of the color to show through. I then went though my stash of sentiment strips and pulled out one from Taylored Expressions which I backed with two strips of black cardstock for dimension. I toyed with putting some sparkles of Nuvo drops on but decided they would make the card too busy. Now I have a black negative space to use, stay tuned...
I also plan to enter this in the Crafter's Cafe Insects/Butterflies, Day of the Month Card Club Best Friend Day, and Love to Craft June Anything Goes challenges.
Thank you for stopping by! Until next time, Hansi
Saturday, June 12, 2021
Graduation Card for a Butterfly
I need a graduation card for a young woman I have known since she was seven who just graduated from the nursing school at Case Western Reserve University and will be pursuing some post graduate training in Pediatric Nursing. Caring and passionate with strong people skills and experience with children and adults with special needs, she is going to be one of those peds nurses that children and their parents remember. Because I didn't want a traditional "congratulations graduate" card, I struggled until I saw this image from the If You Give a Crafter a Cookie challenge:
I thought about how she developed from this young girl on a swim team into a fabulous woman like a caterpillar grows into a butterfly. Butterflies and pastel colors it was going to be! Now which of my too many butterfly stamps and dies should I use? The current Always Fun challenge is layers, and I had a Stampin' Up layering butterfly die set that I bought last year from Stampin' Up and, unbelievably, had not used. I had so much fun with it that you will be seeing it more in the future.
I started by blending Salvaged Patina, Tumbled Glass, and Spun Sugar Distress Oxide ink onto a panel. Then I cut two of the bottom layer die from Neenah Classic Crest Solar White 110 lb. cardstock to stack and one of the top layer from the center of a piece of Dreamy holographic paper from Close to My Heart that I cut to 4 3/8 by 5 5/8. I used one of the sentiments from the Simple Strips Friendship set. This line from Taylored Expressions consists of themed rubber stamps with 18 sentiments per stamp and coordinating dies with different ends which are all interchangeable and easy to line up thanks to squares in the corners and side that you line up. In other words, you can stamp and cut once and have 18 sentiment strips. I have the flagged end die and several stamps and every so often stamp, emboss, and cut a mess of sentiment strips to have on hand to speed up cardmaking. I snipped the tails off the strip and backed it with two 1/4 inch wide strips cut from the Neenah 110 lb. cardstock to pop the sentiment up over the butterflies and, because the butterflies are popped up, cut two more one inch long strips to layer under the part of the sentiment that extends over the background.
I backed the panel with the piece of Dreamy paper from which I had cut the top butterfly layer and a piece of Neenah cut to 5 x 6 1/4 that I embossed using the Subtle folder from Sizzex for Stampin' Up. I toyed with embellishing the card with a few clear sparkles but I wanted to enter this card in Mod Squad Simple Focus challenge. I also plan to enter this card in the Happy Little Stampers June Anything Goes With Dies challenge.
Thank you for stopping by! Until next time, Hansi
Monday, January 20, 2020
My Baby is Turning 30!
Baby Girl is turning 30! I can't be the mother of a 30 year old! Wasn't she a little girl five years ago? I took inspiration for her birthday card from a card in this Jennifer McGuire video and this Freshly Made Sketch:
I cut a mask using the largest Hero Arts oval infinity die and used Gina K Designs' Music Medley stamp to create the background. Next I cut the butterfly layers with a Spellbinders die and the vine with a die by Paper Artist from white cardstock and used sponge daubers to color them with ink. I heat embossed the sentiments (inside and out) and the edges of the butterfly's wings and put small pieces of thin foam tape under the tips of his wings, so they would stay up to provide dimension when I glued his body the the card. I also popped up the sentiment and the front panel.
Here is the inside:
Monday, April 3, 2017
My Favorite Butterfly in Blues
I saw this Addicted to Stamps photo challenge and knew it was time to pull out one of my all time favorite stamps, the butterfly from the retired "Find Your Style" stamp set from Close to My Heart.
I also knew immediately that I wanted to use this Freshly Made Sketch:
To ink the butterfly, I pressed the stamp into my Crystal Blue ink pad and then used sponge daubers to apply Pacifica and Blue Denim. After I fussy cut her out, I sponged some Black around the edge of her wings and colored her body with a black journaling pen. I am not very adept at splatters, so a stamp from the Ink Blot set came in handy to create the border. A single black sparkle and flourish completed the card for now. I am not sure what I am going to use this card for, so I will stamp a small sentiment to the right of the butterfly when I know.
Thank you for stopping by! Until next time, Hansi
Friday, March 31, 2017
Heartfelt Musical Background Stamping
This month the ladies at Heart 2 Heart wanted to see some random or background stamping. My original vision had been to layer on some more color and flourishes reminiscent of distressed B&T paper, but I decided less is more. I started by swirling some Champagne ink with a sponge, working from just off the paper inward. Then I stamped the flowers from the Hello Lovely cardmaking set in New England Ivy and swirled on some Sorbet and Fern. While I was at it I rubbed some Sorbet in the upper left corner. The trick to not making marks when you set the sponge down in the middle of the paper is to ink the rounded edge, pinch the wedge on the pointed side and start the swirling motion before the sponge makes contact with the paper while using a light touch. It is better to layer to build color rather than starting dark. Next I stamped the musical notes from the retired Universal Backgrounds set in Desert Sand. Sometimes I would not completely ink the stamp; other times I would stamp lightly on scratch paper before stamping on the card. I used the same process with the small butterflies from the Your Own Kind of Wonderful set. The larger butterfly from the same set was stamped in Fern.
I embellished the card with some Fern thick twine and a retired Base and Bling charm. Once I had the knot positioned the way I wanted it, I used a glue dot to hold it in position.
Thank you for stopping by! Until next time, Hansi
Materials used, all Close to My Heart unless otherwise noted:
Paper: Sorbet, Desert Sand , and Colonial White cardstock
Ink: Champagne, New England Ivy, Fern, Sorbet, and Cocoa
Stamps: Hello Lovely Cardmaking, Your Own Kind of Wonderful (retired), Universal Backgrounds (retired)
Embellishments: Fern thick twine, Base and Bling charm (retired)
Sunday, October 2, 2016
Be Your Own Kind of Beautiful
I'm still playing with black and white, but this time with a pop of pink and this Atlantic Hearts Sketch:
Thank you for stopping by! Until next time, Hansi
Materials used, all Close to My Herat unless otherwise noted:
Paper: Charlotte, La Vie En Rose (both retired), Black and White Daisy cardstock
Stamps: Your Beautiful Self, Be Your Own Kind of Wonderful (retired)
Ink: Black, Marvy Uchida Le Pen, Tender Pink ShinHan marker
Embellishments: Black Sparkle Flourish (retired)