A crop party is a modern quilting bee. A group of friends gather to have girl friend time, sharing joys and sorrows while preserving memories and creating a special keepsake.

Monday, March 20, 2023

Panda and the Purple Crayon


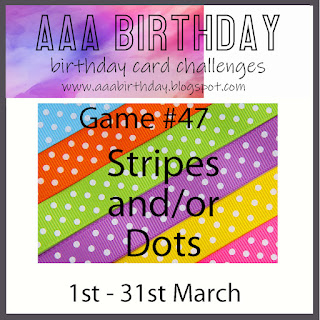
The Seize the Birthday optional topping is a card for a child which motivated me to finally use this panda stamp from Stampin' Up that I have had for four or five years and never used.  As a matter of fact there is a challenge for that.  The NBUS (Never Before Used Schtuff) challenge is designed to inspire us use some of those craft supplies we have have been collecting.  This is one of my aspirations for 2023.  I have started putting newly purchased items in a bin next to my inks to remind me to use them and am also trying to make it a point to pull out older supplies that need to be christened.  As I was thinking about the panda and maybe a balloon, I stumbled on the Once Upon a Time challenge featuring one of my favorite books from childhood, Harold and the Purple Crayon which is about a little boy who uses his purple crayon to bring his imagination to life.  If you have never read it, there is read aloud video posted on the challenge page.  Now I had my concept.  My panda would use his crayon to create a balloon to float over to visit the birthday child and wish them a happy birthday.  I used a die from Altenew's Mix and Match Frames set to cut the dotted border for the AAA Birthday challenge to use dots or stripes.  I used an old, often used punch to cut the balloon, sponged on some ink to give it dimension and popped it up with thin foam tape.  The sentiment was cut using an old die from Simon Says Stamp.  To make the crayon I cut a small strip of purple paper, trimmed the end to look like a crayon, used a flat paint brush to apply ink to the ends and cut it to fit his paw.  Up, up and away my little panda!

I also plan to enter this in the Retro Rubber Anything Goes challenge.   Thank you for stopping by!  Until next time, Hansi


Saturday, March 11, 2023

More Silk Flowers on a CASED Card


The Global Design Project challenge this week is to CASE (Copy And Selectively Edit) this card by Kim Fee:


This is a good one for me to CASE because I still have some of the Paper Studio flowers a friend "encouraged" me to buy when I accompanied her on a trip to Hobby Lobby.  I had an old blended, slightly distressed background in similar colors, so I cut it down and gilded the edges.  I cut out the center and embossed it with an old Stampin' Up 3D embossing folder and then cut a ring to go around  it from some textured gold paper from the Paper Studio.  I backed the square with two pieces of cardstock before attaching it to the card base to give it some dimension.  I  embossed the sentiment from Simon Says Stamp Vintage Garden set and and used the coordinating die to cut it out and stacked it on a second cutout.  After attaching a multi looped bow of gold thread and the flowers, I added some pearls to the embossed center.

I plan to enter this in the Can You Handle the Pressure "Anything Goes with the Optional Twist of Rainbows" challenge which requires the use of an embossing folder and the Beautiful Blossoms Floral Challenge.  Beautiful Blossoms is a new challenge which features an optional mood board and runs from the 15th of the month to the 12th of the following month.  It goes without saying that flowers must be a prominent feature on your project which does not have to be a card.

Thank you for stopping by!  Until next time, Hansi


Sunday, March 5, 2023

Red Violet Scraps and Silk Flowers


I live in the City of Richmond, Virginia.  A childhood friend lives Gloucester which, being rural, is somewhat lacking in retail opportunities.  Sometimes when we meet for lunch, instead of meeting somewhere halfway, she comes up here for a Hobby Lobby fix.  Now I buy pretty much all my crafting supplies online, so I am just along for the ride and company while she shops.  Or at least that's what I tell myself.  Let's just say I walked out with four packages of silk flowers from The Paper Studio and a few other goodies.  I suspect I am not the only one with an enabling crafty friend or two.  

For my first ever card with silk flowers I decided to use the Freshly Made Sketch below to make a card for the {PIN}spiratioinal Flower challenge and a new challenge, the Beautiful Blossoms Floral challenge.  Beautiful Blossoms is a monthly challenge that starts on the 15th of each month and ends on the 12th of the following month.  All entries must have a floral focal point even if the optional mood board does not feature flowers.

In my continuing effort to use my scraps I picked out trimmings that were mostly shades of red violet and glued them diagonally on a piece of printer paper.  After I trimmed the ends I edged the border with Dusty Concord Distress Oxide ink.  

Thank you for stopping by!  Until next time, Hansi


Friday, March 3, 2023

Using My Green Scraps


I love to experiment with different techniques to make backgrounds which means I often have small pieces and trimmings left after cutting them down to card size or to fit behind a die cut window.   My bin was overflowing, so I pulled out the strips and sorted them by color family with the goal of using them on cards.  The Colorful Options Challenge color of the month is green so those are the ones I used to make this card following the current sketch from the CAS Colours and Sketches Challenge blog.


I glued the strips at an angle on a piece of printer paper and trimmed off the edges.  I used the last larger piece of the background I used for yesterday's card to back a window cut using Poppy Stamps' Cat Collage die and gilded the edges with gold embossing powder.  Because the strips were mostly watercolor paper which is pretty thick, I glued a bit of watercolor paper behind the upper half of the window panel to bring it up to the same level as the bottom.   The sentiment is from the So Many Sentiments set by Gina K Designs. 

I also plan to enter this in the Cut It Up CAS and Show Us Your Pussy Cats Furry Thing Goes challenges.  Thank you for stopping by!  Until next time, Hansi


Thursday, March 2, 2023

Happy Birthday in Green and Gold


I made this card for the Colors Hues "Green and Gold," AAA Cards "Circles," Seize the Birthday "Anything Goes," Happy Little Stampers "Anything Goes Watercolor," and Die Cut Divas "Anything Goes," challenges.   For the background I ink smooshed on watercolor paper using Lindy's Magicals on a craft sheet, then misted the paper once it was covered and sprinkled a little more powder on and misted again.  One of the cool things about Magicals is that the shimmer is not always the same color as the pigment.   The cover die is Circle of Leaves by Simon Says Stamp.  I heat embossed a sentiment from an old Close to My Heart set, Just to Say, and popped it up with foam tape. 

Thank you for stopping by!  Until next time, Hansi


Monday, February 27, 2023

Love Always


I made this card for the Die Cut Divas "Show Us Some Gold" and Show Us Your Pussy Cats "Love" challenges and waited to post it until after I gave it to my husband who sometimes reads my blog.  Then I forgot, so here it is just under the wire. 

I started by spraying a 9x12 sheet of bristol paper with Dina Wakely Turquoise and Ocean gloss sprays and Tim Holtz Tarnished Brass Distress spray stain and cutting out a square of it, saving rest to be used on other cards.  Eventually...  To add interest I inked the Sacred Spells stamp from Lavinia with Stampin' Up's Tranquil Tide ink and used second generation stamping on the right side and dabbed some of it along the bottom.  To gild the edges I held the panel upright and pushed each edge into Versamart ink and Ranger Princess Gold embossing powder and heated it.  I also heat embossed the sentiment using a stamp from Hero Arts' Smile stamp and cut set.

I stacked 3 die cuts made using Penny Black's Kitty Love die and colored the heart.  When I didn't like the colors I used I added a fourth layer with the heart colored using Spun Sugar, Abandoned Coral, and Festive Berries Distress inks topped with Wink of Stella and liked it much better.  I popped up the square with two more slightly smaller squares of cardstock and finished it off with an acrylic star.

My husband, known as Soft Touch to our cats, loved the card.  Thank you for stopping by!  Until next time, Hansi 


Sunday, February 26, 2023

Warm Desert Rays


One of my aspirations for the year is to stop collecting and start using the crafting supplies that I just had to have.  None of y'all have that problem do you, lol?  First up is this stamp from Hero Arts, issued to celebrate their 45th year in business in 2019, which I combined with this Freshly Made Sketch


I wanted a sun washed desert feel, so I searched through my stash and found a background created using Cape Cod Coral and Clam Bake Beige from the Lindy's Magicals' Nantucket Pearls set on watercolor paper which I trimmed down to 4 x 5.25 inches.  To create interest I inked the Sacred Spells stamp from Lavinia with Fired Brick Distress Oxide ink and used second generation stamping on the upper left and lower right sides.  I did the same thing using a stamp from Stampin' Up's All Adorned and Festive Berries ink in the lower right corner.  To complete the background I inked around the edges with Abandoned Coral using a small blending brush.

After stamping the sun in Ground Espresso, I used stamps from Stampin' Up's Desert Details set, my MISTI, and Salvaged Patina and Evergreen Bough inks to put down a base for the stripes.  I then randomly dabbed Evergreen Bough and Ground Espresso on the upper stamp and Rustic Wilderness and Ground Espresso on the lower stamp and stamped again to give them a distressed weathered look.  I stamped the sentiment using one from the same set in Ground Espresso.  To add dimension I cut the trimmings from the original background to make some narrow stripes.  I finished the panel with some clear acrylic drops I had on hand and popped it up on a card base with two extra panels of cardstock.

I love the seventies vibe of the stamp and the warm sun washed look of the finished.  Thank you for stopping by!  Until next time, Hansi


Wednesday, February 15, 2023

Always in Our Hearts


The current Time Out Challenge is to CASE this card by Gina K: 


If you are new to the concept, CASE stands for Copy And Selectively Edit.  Gina has an easy to recognize style involving ink blending with stamping, often silhouette, over it, lots of white space, and a thin black mat mounted on a white card base.  This pet sympathy card, based on the comforting idea of The Rainbow Bridge, is my take on it.  I used small blending brushes and Distress ink with a stencil made with  a heart die from Stampin' Up and a piece of Gina K Masking Magic to create a rainbow heart.  The cat was cut from black cardstock using a die from Paper Roses and the sentiment is from an old Close to my Heart set, Big Hug.  I used a die from Altenew's Mix and Match Frame set to cut the black dots around the edge.

I also plan to enter this the Make My Monday All Creatures Great and Small and Allsorts A/G with option of All About Hearts challenges.

Thank you for stopping by!  Until next time, Hansi


Sunday, January 29, 2023

Kitties Sparkling for Christmas


The cats were not part of the plan.  No, really!  The plan was to emboss an old Hero Arts stamp, Branches and Flourishes Christmas Tree, using PEARLustre Emerald embossing powder from Stampendous, embellish it with bitty sparkles that were colored with a red alcohol marker and top it with a gold sparkle from Stampin' Up.   Gold embossing a sentiment from an old Close to My Heart set, Holiday wishes, would complete a CAS card for the Stamping Sensations "Add Some Sparkle" and ABC Christmas "A is for Anything Christmas Goes" challenges.  

Alas, when I went to embellish the tree it came to my attention that the power on the end of the lower right branch had failed to melt and had since smeared.  What to do?  Cover it up, of course.  One of my favorite dies, labeled simply "Cat Set" from Impression Obsession to the rescue!  I embossed the sentiment on a strip popped up with thin foam tape to provide something for the cats, which had been cut three times and stacked for dimension, to stand on.  And you know they had to have blingy collars for the holidays.  Thanks to them I will also enter this card in the Show Us Your Pussy Cats "Furrything Goes" challenge because as far as Luna and Calli are concerned, the kitties are the stars of the show.  That tree is just the backdrop for them.

Thank you for stopping by!  Until next time, Hansi


Saturday, January 28, 2023

Magicals and Embossing Folders


I have been experimenting with Lindy's Magicals, and after seeing this Jennifer McGuire video, I have been thinking it might be fun to try them with embossing folders.  Can You Handle the Pressure, a new to me challenge, has provided the motivation to actually do it.  Can You Handle the Pressure is an anything using an embossing folder goes with an optional twist challenge which begins on the second and fourth Saturday of each month at 12:00 a.m. and ends at 8:00 p.m. the Wednesday before the next challenge begins.  The current optional twist is borders. 

After trying all three of Jennifer's techniques with different folders I selected one using Hydrangea Blue and Sweet Violet Purple Teal from Lindy's Magicals' Victorian Bouquet set and the Swirls and Curls embossing folder from Stampin' Up,  I embossed a piece of watercolor paper, sprinkled the powders on it, and spritzed with lots of water.   It doesn't show in the picture above that the mica in Sweet Violet Purple Teal is teal.  It shows a bit better in this photo I took outside with the card angled to the sun:


Now to make a card!  I used this sketch from the Global Design Project:


I cut the embossed panel into sections.  Two pieces to use for this card, a full length strip to use on another card, and three smaller leftover pieces to put in my scrap organizer for use later.


I edged the embossed pieces with Villainous Potion Distress ink and attached them to a piece of watercolor paper with a strip of silver foil paper to separate them.   When I place the panel against the card it didn't seem grounded, so I cut a mat in white and inked the edges with Villainous Potion Distress Oxide ink which was too bright, so I toned it down with a little Dusty Concord Distress Oxide.  I made three hello die cuts using a Birch Press Design die and stacked them for dimension.  Lastly I nestled some silver pearls from Stampin' Up in the swirls on the purple side.

I also plan to enter this in the Birthstone Challenges, a new challenge that runs in six week cycles beginning the first of of each odd numbered month and ending the 15th of even numbered months.  For each challenge we are asked to create any project featuring the birthstone colors of the challenge period which for January and February would be garnet and amethyst meaning red and/or purple.  You may use one or both colors and include other colors, but the birthstone colors must be dominant.

Thank you for stopping by!  Until next time, Hansi


Monday, January 23, 2023

Enjoying Snow From the Warm Side of the Window


The Inspiration Station Challenge prompt for January is this photo:


The cat, of course, caught my eye as did the fact he is on the warm side of the window which is the only way my pointy eared darlings experience snow.  The other element that attracted me was that this is not a photo, but a piece of art with texture from brush strokes and layers of color.  I knew at once that I would use my Prismacolor pencils, my Poppy Stamps window die, a cat die (I have a few), and the Pine Trees 3D Shading stamp from Spellbinders that I think I bought right before the Pandemic.  

I stamped the trees with light gray ink and colored over them with my pencils.  I applied a little Stickles on the tops of the branches which shows up yellow in this picture. I used an Impression Obsession die to cut the cats three times each, stacked them, used dark gray and black pencils to create contours, and then applied a layer of Glossy Accents over them.  I cut three windows and stacked them with a piece of acetate between the bottom and middle layers.  The background panel was cut using a stitched nesting frame from Penny Black.  I cut the stamped trees down to fit behind the window and attached the cats to the front.  I tucked a piece of thin foam tape between the upper part of each cat and the acetate to level it up to the lower portion that was attached to the window sill.  The sentiment comes from Gina K Designs' Sparkling Snowflakes set.

In addition to the Inspiration Station challenge, I plan to enter this card in the Retro Rubber "Winter Scenes", Cut It Up "Anything Goes", and Crazy for Cats "Anything CAT Goes" challenges.  Thank you for stopping by,  Hansi