The Global Design Project challenge this week is to CASE (Copy And Selectively Edit) this card by Kim Fee:
The current Time Out Challenge is to CASE this card by Gina K:
If you are new to the concept, CASE stands for Copy And Selectively Edit. Gina has an easy to recognize style involving ink blending with stamping, often silhouette, over it, lots of white space, and a thin black mat mounted on a white card base. This pet sympathy card, based on the comforting idea of The Rainbow Bridge, is my take on it. I used small blending brushes and Distress ink with a stencil made with a heart die from Stampin' Up and a piece of Gina K Masking Magic to create a rainbow heart. The cat was cut from black cardstock using a die from Paper Roses and the sentiment is from an old Close to my Heart set, Big Hug. I used a die from Altenew's Mix and Match Frame set to cut the black dots around the edge.
I also plan to enter this the Make My Monday All Creatures Great and Small and Allsorts A/G with option of All About Hearts challenges.
Thank you for stopping by! Until next time, Hansi
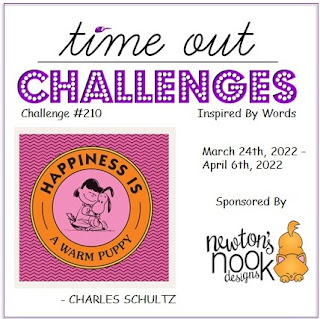
The current prompt at Time Out Challenges is "Happiness is a warm puppy." When I was growing up you saw this Peanuts meme on everything from tee shirts to coffee mugs.
I'm sorry Lucy, in my world happiness is a purring cat (or two).
To start, I blended Worn Lipstick, Wild Honey, and Salty Ocean Distress oxide inks onto a card front, stamped over it with the Bookshelves rubber cling stamp from Impression Obsession, and ran the edges along a black inkpad to ground the image. I used a CZ Design die set to cut the sentiment and shadow from Champagne foil and vellum paper. The shadow die has openings for the p's, b, and d which I sometimes find distracting on a busy background, so I saved the negative spaces and glued them in. The mama cat was cut with a die from Spellbinders and the kittens from a set by Obsession Impression.
This card is for my sister, a kindergarten teacher who is owned by a ginger cat. I plan to also enter this card the Die Cut Divas Birthday challenge. Thank you for stopping by! Until next time, Hansi
This card was inspired the photo prompt below for the Through the Purple Haze "Anything Goes With Optional Color Palette" challenge using a love theme for the My Time to Craft "All You Need is Love" and Cut It Up "Love or Valentine's Day" challenges.
I started by blending Ripe Persimmon, Peacock Feathers, Broken China and Chipped Sapphire Distress inks onto white cardstock. I cut the cats using a punch from Stampin' Up, flipped one and intertwined their tails. After making note of where they would be on the card I carefully masked off parts of the Wildflowers stamp by Simon Says Stamp so the flowers would frame the cats without creating busyness behind them. I cut the heart out of Grapefruit Grove holographic paper from Stampin' Up using one of their dies and used another Stampin' Up die to cut the word love three times and stacked them. Once assembled, I matted the panel with more of the Grapefruit Grove holographic paper and black cardstock. Lastly I embellished the card with Iridescent Crystals from Studio Katia.
Thank you for stopping by! Until next time, Hansi
In my family of cat lovers Halloween cards must feature a cat or two or five... You could say that this die cut from Penny Black is purrfect. Actually the cats are in a horizontal frame which I cut off because I envisioned a nice big moon which wouldn't fit, but I am getting ahead of myself.
I started with a piece of Bristol and positioned a circle where I wanted the moon to be. I used blending brushes to apply areas of Bundled Sage, Shabby Shutters, Peeled Paint, Antique Linen and Speckled Egg Distress inks. Next I used a fan brush to flick mostly small drops of water on the panel, let them air dry, and reapplied more ink to soften the effect. I brushed more Antique Linen around the moon and Shabby Shutters around the edges of the panel. Next I brushed Speckled Egg in random spots though the Starry Night stencil from Hero Arts to give some texture and spookiness to the sky. I removed the circle mask, lightly brushed on Colonial White pigment ink from Close to my Heart and Antique Linen and Old Paper distress inks to give the moon some dimension, and then outlined it with a Stardust Gelly Roll pen. I stamped a sentiment from Close to My Heart's Purrfect Halloween set, attached the die cut and then attached the completed panel to a Very Vanilla cardbase.
I plan to enter this card in the Two Old Bats Anything Halloween, Simply Create Too All Things Spooky, Scary, Etc, Cut It Up Trick or Treat, and My Time to Craft! Halloween or Fall Colours challenges.
Thank you for stopping by! Until next time, Hansi
The theme for the current Paper Players Challenge is Spooky with this mood board for inspiration:
Anyone who knows me will know I zeroed in on the cat. I was also attracted to the greenish sky and the moon. This was my cue to leave my usually fairly clean, smoothly blended ink with die cuts style and go out of my comfort zone. I love the look of layers and layers of ink and images but am intimidated by the idea of creating it, so I took a leap of faith!
I started with a piece of Tim Holtz watercolor paper, masked off a circle for the moon with masking paper and positioned a deckled rectangle stencil from A Colorful Life Designs over the smooth side. I used a blending brush to apply areas of Bundled Sage, Shabby Shutters, Peeled Paint, Antique Linen and Speckled Egg Distress inks. Next I used a fan brush to flick mostly small drops of water on the panel, let them air dry, and reapplied more ink to soften the effect. Next I brushed Speckled Egg in random spots though the Starry Night stencil from Hero Arts to give some subtle texture. Then I used a small acrylic script stamp without a block, inked it with Vintage Photo Distress ink, stamped off on scratch paper, and then pressed parts of it randomly along the left side. I stamped along the bottom with Frayed Burlap and Ground Espresso using a stamp from Stampin' Up's Timeless Textures set. I removed the circle mask and lightly brushed on Antique Linen and Old Paper to give the moon some texture. I used too heavy a hand and had to lighten it with a bit of Hero Arts Unicorn White pigment ink. Now I could finally remove the stencil to admire my handiwork. For a first attempt I was pretty pleased with it. I stamped the Tree of Courage from Lavinia Stamps in Ground Espresso Archival ink from Ranger and Mooch the Cat from Lavinia Stamps and a Sentiment from Close to My Heart's Purr-fect Halloween set in Black Archival ink. By the way, smooth is relative. I had to stamp Mooch four times and the sentiment three to get a solid impression on the "smooth" side of the paper. I used dark brown and black Prismacolor pencils to create a shadow under Mooch to ground him and a Gelly Roll #700 pen to outline the moon and add some reflected moonlight to Mooch's head and left side. I used foam tape to attach the panel to a card base made with Always Artichoke cardstock from Stampin' Up.
Here is the inside using the same materials and techniques featuring Mooch's sister, Mimsey, from Lavinia.
In my world pets are four legged children whose loss requires a sympathy card. I made this one based on this Paper Players sketch:
Father's Day is bittersweet for me as Daddy passed in 2013, but there is another Daddy in my life, my husband, who is a devoted father to our grown daughter with special needs and gets card from me every year to show my appreciation for all he does. This year's is based on this Freshly Made Sketch:
Thank you for stopping by! Until next time, Hansi
A young man I have known for years is graduating from high school. He is on the more involved end of the autism spectrum and would not appreciate the usual style graduation card but might like a card with bright colors and identifiable objects. I often make cards featuring this stamp of a cat being lifted up by the balloons he is holding. I cover the stamped balloons with balloons cut from cardstock using the Stampin' Up balloon punch. The problem is the punch cuts balloons in two sizes, and it is awkward to try to cut only the smaller one, so I have a considerable stash of larger balloon die cuts begging to be used.
I selected five in primary and secondary colors but had to cut an orange one because I rarely use orange. I sponged the edges of each balloon with ink to give them some dimension and arranged them in the order of the color wheel, so I could enter this card in the Use Your Stash Rainbow challenge. The back three balloons are glued directly to the card panel. The blue and yellow ones are attached with thin foam tape and the green with thicker foam tape.
I used an old Spellbinders die to cut the word Hooray three times and stacked them. The sentiment strip comes from a Taylored Expressions Simple Strips stamp and die set. I drew the balloon strings with a black gel pen.
As graduation is a special occasion I am also entering this in the Water Cooler Wednesday All About Occasions challenge. Thank you for stopping by! Until next time, Hansi
I always have a stash of backgrounds ready to use, some like this one, feature ink blending. Many people like blending with Distress Oxide inks because they are not quick to dry which makes getting a smooth blend easier, and being opaque, you can cover mistakes. I prefer regular Distress inks because the colors are more intense and I like how one color seems to glow through the other. Unfortunately that means sometimes my transitions are blotchy or not as smooth as I would like. Then there is the dreaded unintended ink "embellishment" which seems to happen when I have a lovely blend going:
With Oxide inks I could let it dry and then go over that section to cover it. With Distress there is no getting away from it. This background went into my backgrounds that will need special consideration to use. Often such backgrounds are cut into strips or die cuts or are used to back window die cuts that only reveal the parts I like as with this card set.
A few days ago I finally got around to using a layered butterfly die set from Stampin' Up and had some lovely negative space leftovers that were worth saving. I wanted to enter the Use Your Stuff Rainbow challenge in honor of Pride Month and knew I had a few rainbow backgrounds including this "needs special consideration" one. It just so happened that the butterflies were in just the right place to hide the ink blot. I cut only the top butterfly layer to allow more of the color to show through. I then went though my stash of sentiment strips and pulled out one from Taylored Expressions which I backed with two strips of black cardstock for dimension. I toyed with putting some sparkles of Nuvo drops on but decided they would make the card too busy. Now I have a black negative space to use, stay tuned...
I also plan to enter this in the Crafter's Cafe Insects/Butterflies, Day of the Month Card Club Best Friend Day, and Love to Craft June Anything Goes challenges.
Thank you for stopping by! Until next time, Hansi
I have been toying with trying a slimline card which requires thinking long and lean vs compact. The current Inkspirational challenge is to make a slimline card, so I took that as my cue to take the plunge. This cat and balloon stamp from Inkadinkadoo would give me a head start towards vertical thinking. I don't really like the balloons on the stamp so I usually cover them up with paper balloons. The Paper Players are running a color challenge featuring bright, summery colors: Melon Mambo, Bermuda Bay, Grannie Apple Green and Black (or white). Now that I had my color scheme it was time to get to work.
I stamped the kitty and used the Stampin' Up balloon punch to cut balloons from paper in the challenge colors. I wanted to sponge them with ink to give them some dimension, but unfortunately don't have those colors in Stampin' Up ink, so I used Picked Raspberry, Peacock Feathers, and Mowed Lawn Distress inks which were almost identical. It took several coats to get the shading to show up as I wanted. Then I glued the Grannie Apple Green balloon directly to the panel, used thin foam tape to attach the Melon Mambo one and thick foam tape to attach the Bermuda Bay one, so each balloon is at a different level. I used the birthday die included in the Gina K Designs Forever Flowers card kit to cut the word birthday and a stamp from the Lace Flowers stamp set also included in the kit to heat emboss the sentiment strip. What I love about this particular birthday die is that there is no dot over the letter "i" that I need to avoid losing. I used a border punch from EK Success to cut circles from the cardstock and arranged them along the bottom to draw the eye down and repeat the colors in another part of the composition.
I plan to enter this card in the Craft Rocket Birthday and Seize the Birthday Anything Goes challenge. Thank you for stopping by! Until next time, Hansi