A crop party is a modern quilting bee. A group of friends gather to have girl friend time, sharing joys and sorrows while preserving memories and creating a special keepsake.
Showing posts with label embossing folder. Show all posts

Sunday, October 19, 2025

Snowflake in a Night Sky


Viewed straight on:


Viewed when you tip it in the light:


I am in well into Christmas card making madness.  Snowflakes are one for my favorite design elements, and of course this Freshly Made Sketch screamed snowflake to me.


I have been playing with embossing folders and ink lately, so I went straight to my favorite snowflake embossing folder, Snowflake Swirls by Darice, for the background.  I started with black watercolor paper, embossed it and sprayed it with Juniper Berry mica spray by Tim Holtz, and Balmy Night shimmer spray by Dylusions plus water and let it dry naturally.  Once it was totally dry I embossed it again because all that ink and water flattened the design a bit.  Next I used a brayer to apply metallic pigment ink from Color Box to bring out the snowflakes and swirls. 

For the snowflake I used the Sizzix 3D Impresslits Snowflake folder by Tim Holtz  to cut one from silver and one from white 110 lb white cardstock and stacked them.  I topped it with two snowflakes cut using the Beautiful Blizzard die from Stampin' Up which I stacked and embellished it with a blue sparkle.  I heat embossed a sentiment from the Very Merry Christmas stamp set by Close to My Heart and edged the strip with more of the Color Box silver metallic ink.  I finished the card with some bitty sparkles from Close to My Heart in the centers of the background snowflakes.

I addition to the Freshly Made Sketches challenge, I plan to enter this card in the Cut It Up Add Embellishments,  Can You Handle the Pressure Anything Goes With A Twist Of Fall (optional), and BYSH (Build Your Stash Holiday) Cardmakers Falling for the Holidays 2025 Linky Party challenges.  Why not check out the other entries in these challenges and maybe be inspired to enter yourself? 

Thank you for stopping by!  Until next time, Hansi


Monday, September 15, 2025

Digging Into My Stash to Make a Birthday Card


I need a birthday card for someone who loves cats and gardening.  The Shopping Our Stash theme is "The Cat is in the Bag" which means use a cat (no problem for this proud, crazy cat lady) or a purse, bag, backpack, etc.  I decided to challenge myself to use mostly old, as in retired, products.  When I saw this Freshly Made Sketch my concept began to form in my head.

I do not have arch dies, but I do have a retired die, Kitty Window, from Tutti Designs featuring cats looking on a garden through a cathedral shaped window.  I cut two from 110 lb white cardstock and stacked them.  Now for a background to go behind the window.  I looked though my stash of backgrounds and found one with appropriate colors made using Lindy's Magicals.  Because the current theme at Seize the Birthday is embossing, I put the background upside down in a retired 3D Fern embossing folder from Stampin' Up so that the design would be debossed, that is pressed down into the paper.  Then I rubbed a Stampin' Up ink pad in Wild Wasabi, a retired color, over it, so you could see the ferns.


Please forgive my stained craft mat and the quality of photos taken with my phone as I worked.  After selecting the part I wanted to use I traced around the window portion and cut it out.


Because the background was done on thick watercolor paper, the window portion of the die cut would be thicker than the window sill and cats' tails, so I needed make another die cut from watercolor paper, trim off the part I needed and glue it on the back to level up the die cut.


Now that my focal point was done I could work on the rest of my card.  I cut a 4 x 5.25 inch panel and embossed it with a retired Stampin Up embossing folder which I think was called Subtle.  I gilded the edges by holding the panel vertically and pressing each edge into Versamark ink, then Ranger Princess Gold embossing power, and melting the powder with my heat tool. 

I used the the retired Perfect Sentiments stamp and die from Pink Fresh Studio for the sentiment.  It is a single stamp and die which makes eleven  assorted sentiments at a time.  Because part of the sentiment over laps the cat die cut I ran into the same issue of having the prop up the part that was hanging off.  I put two small pieces of card stack and one of watercolor paper under the Happy Birthday sentiment in the die to make shadow pieces pieces that I could stack so they were the same height as the cat die and then snipped off part of it to glue onto the back of the sentiment to make it level.


Now all I had to do was put everything together on a card base and I had a birthday card.  Except for the paper, Magicals, and embossing powder, everything used in this card is not only older, but no longer available.  I also plan enter this card in the Sisterhood of Crafters Birthdays challenge.  

This is what it looks like when you tilt it to light.  I love Lindy's Magicals.


Thank you for stopping by!  Until next time, Hansi


Tuesday, September 9, 2025

A Simple Quick(ish) Christmas Card


'Tis the season for stepping up my Christmas card making.  To make it easier I have an 8 x 14 lucite bin that I store all my Christmas themed dies, embossing folders, stencils, and leftover die cuts.  I keep the stamps separately "filed" in a drawer by theme such as sentiments, snowflakes, trees, religious, etc.    Because snowflakes are my favorite design element, I get out all my snowflake dies early in the year and cut multiples of each and keep them sorted in clear "flip flop" pockets.  If I need a quick Christmas card I can get out a card base, pick a background from my stash or a trimming from one, add a large snowflake or several small ones, a leftover sentiment or quickly stamp one, add a sparkle in the center of the snowflakes and I have a card.  If I have time I can add a few more touches like an extra layer or embossing.  

Towards the end of summer I go through my other stencils, embossing folders, and dies and add any that might be useful to my Christmas bin to have handy,  Let's face it.  Most of the cards I will be making for the next few months will be holiday cards.  Last week when I was looking through my embossing folders I found a Sizzix 3D Impresslits Snowflake folder by Tim Holtz hiding in the back which was easy for it to do given that it's only @ 3 x 4.5 inches.  It cuts and embosses a 2.75 and 1.75 inch snowflake in one step.  Talk about a time saver!  I bought it as part of the 2021 release and forgot all about it.  It has now lost it's status as a NBUS (Never Been Used Stuff).  I used it and the sketch below from CAS Colours and Sketches for the Alphabet K for Keep it Simple Challenge.


I followed the "add a few more touches" version of my quick(ish) formula.  I picked a strip left over after trimming a background I made, I don't know how long ago, and swiped the edges with ColorBox silver metallic pigment ink.  I put a small scrap of silver foil into the newly rediscovered embossing folder, ran it through my die cut machine and had a 3D snowflake to use now and a small one for my stash.  I looked through my snowflake stash and selected one cut using the retired Beautiful Blizzard die from Stampin' Up to layer on the silver one and finished my focal point with a sparkle.  I cut a 4 x 5.25 piece of white to add a layer for interest and heat embossed a sentiment from Close to My Heart's Snow Flurries set in silver.  All that was left to do is attach everything to the card base and stamp a sentiment inside.  In less than half an hour I had a card.

I also plan to enter this in the NBUS, Jingle Belles Cardstock Christmas (no patterned paper), Can You Handle the Pressure Anything  Goes Using an Embossing Folder, and Peace on Earth Anything Christmas Goes Challenges.  Thank you for stopping by!  Until next time, Hansi


Tuesday, July 29, 2025

Winter Snowflakes


It is Christmas in July at the Just Add Ink challenge blog, and it is always Christmas at Peace on Earth Christmas.  Although the Peace on Earth challenge is always anything Christmas/winter holiday goes they put up an optional mood board which this time features snowmen.  The current challenge at Cut It Up is something monochromatic.  After thinking about all three challenges I had my concept. 

I embossed a piece of watercolor paper using the Sizzex Winter Snowflakes 3D embossing folder and sprayed it with Tim Holtz Distress mica sprays in Snow Flurries, Juniper Berry, and Brushed Pewter along with water to move the inks around.  Once it was dry I ran it through in the embossing folder again to crisp up the impression because all that liquid flattened it out a bit.  I used my finger to lightly rub Color Box Silver metallic ink on the raised parts to bring out the snowflakes.  Holding the panel vertically I pressed the edges into a Versamark inkpad and then Ranger Super Fine embossing powder and heated them.  I put a slightly smaller piece of heavy cardstock behind the panel to give it some lift and attached it to the card base.  I used a die from Paper Rose to cut Merry Christmas three times and stacked them for the sentiment.  I finished the card with clear sparkles in the center of some of the snowflakes.  

I now have two Christmas cards which I can repeat in other colors.  Thank you for stopping by!  Until next time, Hansi


Sunday, January 21, 2024

Trying a New Technique With a Never Used Embossing Folder


For this card I used a new to me technique featured in this Jennifer McGuire video.  You emboss a piece of watercolor paper, spray it with your favorite ink spray and water, let it dry, and repeat until you like how it looks.  Then, because all that water will somewhat flatten out the paper, you emboss it again.  Embossing before spraying encourages the ink to pool in ways that enhance the design.  I needed a birthday card for my husband, so I flipped through my embossing folders for something a little masculine and found a Tim Holtz 3D Texture Fades folder that I have had for something like five years and had never used!  How did that happen?!  I am sure y'all never lose track of what you have...  The folder is called Foundry and I used Tree Lot, Frosted Juniper, and Antiqued Bronze Distress Mica sprays.  I used A Paper Rose die to cut the sentiment twice in thick black cardstock and once in Copper Foil paper and stacked them.  The cats were cut from some brown metallic paper from Michael's using a set from Impression Obsession and stacked on more black cardstock.  I found they faded into the background, so I used some Pebo Copper Guilding Wax which is a new addition to my craft collection, I mean stash, to give them more dimension and make them pop out.  Our pointy ear darlings would tell you that is how is should be because the cats are the most important element.

Here is the inside of the card.


I stamped a sentiment from Close to My Heart twice using Rustic Wilderness Distress Oxide ink and then dabbed a Copper Color Box pigment pad on some of the edges of the stamp and stamped a few times.  I love my MISTI!  It doesn't show well in the photo but shines in real life.  The strip at the bottom was leftover after trimming down the front panel.  My water color paper is 9x12 so I start with 4.5x6 paper.  Tim Holtz embossing folders are 6 inches inches long to accommodate standard the card size in the U.K.  I like having trimmings to play with.

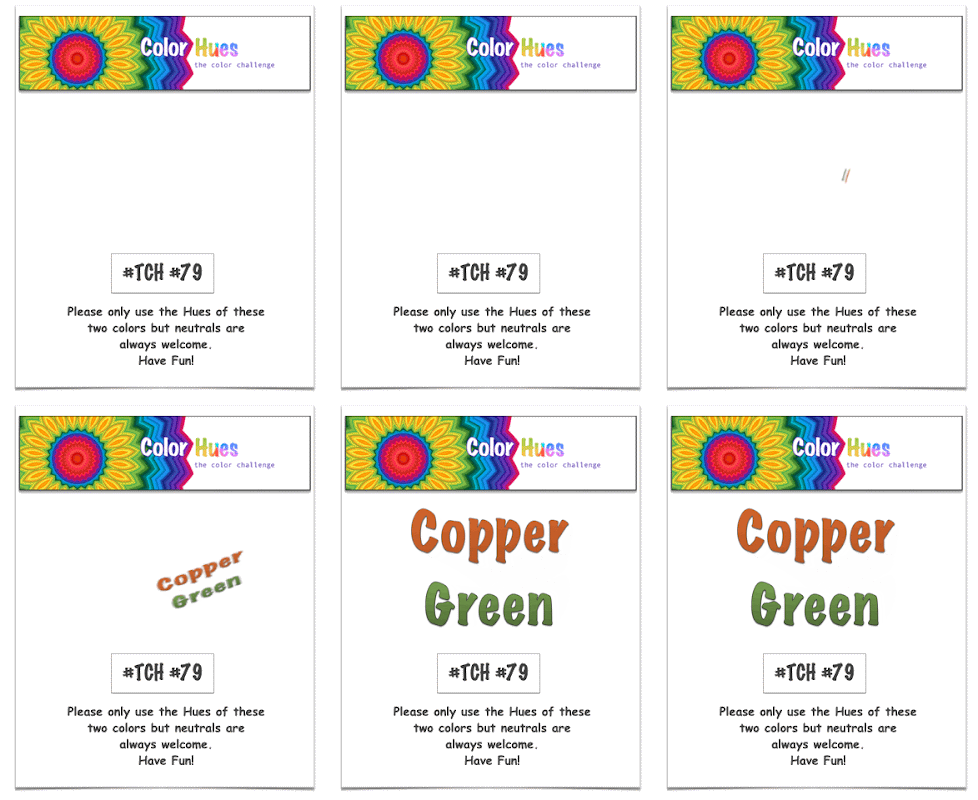
I plan to enter this card in the Cut It Up challenge to use a new product, tool, technique, etc., the Die Cut Divas challenge to use a never been used item, Seize the Birthday challenge to use embossing, Color Hues Challenge to use copper and green, and the Mix It Up challenge to make anything with the option of mixed media.

Thank you for stopping by!  Until next time, Hansi


Saturday, January 28, 2023

Magicals and Embossing Folders


I have been experimenting with Lindy's Magicals, and after seeing this Jennifer McGuire video, I have been thinking it might be fun to try them with embossing folders.  Can You Handle the Pressure, a new to me challenge, has provided the motivation to actually do it.  Can You Handle the Pressure is an anything using an embossing folder goes with an optional twist challenge which begins on the second and fourth Saturday of each month at 12:00 a.m. and ends at 8:00 p.m. the Wednesday before the next challenge begins.  The current optional twist is borders. 

After trying all three of Jennifer's techniques with different folders I selected one using Hydrangea Blue and Sweet Violet Purple Teal from Lindy's Magicals' Victorian Bouquet set and the Swirls and Curls embossing folder from Stampin' Up,  I embossed a piece of watercolor paper, sprinkled the powders on it, and spritzed with lots of water.   It doesn't show in the picture above that the mica in Sweet Violet Purple Teal is teal.  It shows a bit better in this photo I took outside with the card angled to the sun:


Now to make a card!  I used this sketch from the Global Design Project:


I cut the embossed panel into sections.  Two pieces to use for this card, a full length strip to use on another card, and three smaller leftover pieces to put in my scrap organizer for use later.


I edged the embossed pieces with Villainous Potion Distress ink and attached them to a piece of watercolor paper with a strip of silver foil paper to separate them.   When I place the panel against the card it didn't seem grounded, so I cut a mat in white and inked the edges with Villainous Potion Distress Oxide ink which was too bright, so I toned it down with a little Dusty Concord Distress Oxide.  I made three hello die cuts using a Birch Press Design die and stacked them for dimension.  Lastly I nestled some silver pearls from Stampin' Up in the swirls on the purple side.

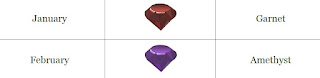
I also plan to enter this in the Birthstone Challenges, a new challenge that runs in six week cycles beginning the first of of each odd numbered month and ending the 15th of even numbered months.  For each challenge we are asked to create any project featuring the birthstone colors of the challenge period which for January and February would be garnet and amethyst meaning red and/or purple.  You may use one or both colors and include other colors, but the birthstone colors must be dominant.

Thank you for stopping by!  Until next time, Hansi


Friday, October 29, 2021

A Cool "Burnt Wood" Technique


I had been pondering all week how I would use the Paper Players sketch below when I saw this video by Gina K Design. 


Essentially you score a piece of cardstock, lightly swipe ink over it, set up the sandwich for embossing a die on your die cut machine, place the panel face down on the rubber mat and the stencil on top, emboss the stencil (which actually debosses it), and then swipe more ink over it.  Being in full Christmas card mode, I used a snowflake stencil from Stampin' Up.  Rather than use the colored pencil and Gamsol technique Gina used, I lightly colored the snowflake impressions with a colored pencil.  I cut 1.5 x 3.75 inch panels, swiped more ink round the edges, and stacked each on two layers of heavy Very Vanilla cardstock for dimension.  I attached the outer two panels first and then lined up the middle panel evenly between them.  HINT:  Pay attention to how the design lines up.  I had to perform a card-ectomy because I attached the middle panel upside down.

I had sort of an antiqued brass embellishment I wanted to use to anchor the sentiment, but it did not show well.  I tried coating it in gold embossing powder, but it still didn't show, so I tried platinum powder from Ranger which worked, but I did have to sacrifice some of the detail.  I like to think it evokes the look of old worn hardware on a wooden cupboard.  I used the same powder to emboss the sentiment and gild the edges.

This technique would work well for any masculine card.  Thank you for stopping by!  Until nexy time, Hansi

Monday, July 5, 2021

I Always Need Birthday Cards


This week's Color Throwdown Challenge is to use purple, blue, and green in a project.  Have I ever mentioned that my favorite color scheme is Cool Analogous, adjacent colors on the cool side of the color wheel?  The Addicted to Stamps and More Challenge is celebrating it's ninth birthday with a challenge to make a birthday card.  I don't know about y'all, but every time I turn around I need a birthday card.  For this reason I like to play the Seize the Birthday Challenge which currently has the optional topping of using an embossing folder.  Cool colors are sometimes referred to as the colors of water and I have a folder that looks like waves.  Just Add Ink is challenging us to make a shaker card which is always fun on a birthday card and I have a Happy Birthday die set from CZ Design which is perfect to make one with.  Isn't it great when all these challenges work together to make a card you know you will need?

First things first.  I embossed a piece of white cardstock with an old folder from Lifestyle Crafts.  Then I flipped it over and swiped ink pads over the back side where the design is pressed into the paper otherwise known as the debossed side.  When I was happy with the look I trimmed it down to fit on an A2 card with a narrow border.   Next I used the shadow die from the CZ Design Happy Birthday Lucky to Know You set to make an opening in the middle.  I held the negative space piece on my card base so I would know where to put the backing, applied glue to the back of the shadow and glued it to the card base by fitting it into the opening and removed the negative piece.  I then glued a piece of shimmer vellum over the shadow to finish the background of my shaker element.  Now to back to the top part of the card.  I glued a piece of acetate behind the opening.  I cut the sentiment from both white and purple card stock, stacked them, and glued the sentiment to the front of the acetate.  Once everything was dry I carefully fit pieces of foam tape to the back of the top piece making sure the pieces fit tightly around the opening, so shaker bits could not escape later.  Speaking of shaker bits:  I went though three packs of mixed sequins to pull out pieces in the challenge colors plus a few white and silver ones.  This is what everything looked like before I put it together:


The last thing to do was put the shaker bits on the card base, remove the tape backing, slather the foam tape with liquid glue so I could fine tune the positioning, flip it, and attach the top to the card base.  On hindsight, I think I may have put in too many shaker pieces.  

Now I have a card for a forgotten about birthday or when my husband asks me for one for a friend.  He graciously puts up with my papercrafting addiction because he knows I will keep him supplied with cards as needed.  Thank you for stopping by!  Until next time, Hansi