A crop party is a modern quilting bee. A group of friends gather to have girl friend time, sharing joys and sorrows while preserving memories and creating a special keepsake.
Showing posts with label Atlantic Hearts Sketch Challenge. Show all posts

Sunday, August 30, 2015

Atlantic Hearts Sketch Challenge 122 Take Two


When I was making this card for this week's Atlantic Hearts Sketch Challenge, I had to add color to the ornaments to co-ordinate with the paper, but I found myself thinking about how elegant they looked in just gold and white.  This inspired me to make a gold and Colonial White version of the sketch.   


I sponged a little Metallic Gold ink along the edges of each ornament to help separate them from the background and used thin foam tape to attach the background panel to the card base to give the card some dimension while still making it easy to mail.  I don't know if you are allowed to enter more than one card, but I like this one too much not to enter it!  

Thank you for stopping by!  Now why don't you check out how others have interpreted this Atlantic Hearts Sketch?  Until next time, Hansi

Materials used, All Close to My Heart unless otherwise noted:
Paper:  Colonial White cardstock, Metallic Gold paper of unknown brand that I ordered through Amazon 
Stamps: Holiday Cheer,  Mosaic Madness by Stampin Up
Ink:  Versamark, Metallic Gold by Color Box
Embellishments:  Ranger Princess Gold embossing powder

Atlantic Hearts Sketch Challenge 122


One of the things about challenge blogs is that you get exposed to products from many companies.  I don't know about you, but occasionally I see one that I just have to have.  Such was the case with this stamp and punch set.  When I saw this sketch from Atlantic Hearts, I knew it was time to break it out.


I stamped the ornaments with Versamark and embossed them using Ranger Princess Gold embossing powder which is available through Close to My Heart.  I love this product line because the powders are so finely ground that they melt smoothly and keep the details in your image.  While I was at it, I embossed the sentiment from Close to My Heart's Holiday Cheer set.  I then added some color to my shiny, gold ornaments using a Cherry Pink ShinHan marker and embellished them with Pearl Opaques (retired).    

Thank you for stopping by!  Now go see the beautiful cards others have made for this Atlantic Hearts Sketch Challenge.  Until next time, Hansi

Materials used, all Close to My Heart unless otherwise noted:
Paper:  Pear and Partridge (retired), Cashmere and Colonial White cardstock.
Ink:  Versamark, Cherry Pink ShinHan marker
Stamps:  Holiday Cheer, Mosaic Madness by Stampin Up
Embellishments:  Pearl Opaques (retired), Ranger Princess Gold embossing powder

Sunday, May 24, 2015

An Atlantic Hearts Graduation Card


I am sorry to have disappeared off the face of the earth, but it has been a difficult time for my family.  One good thing that has happened, however, is my nephew's graduation from Virginia Tech which called for a return to my craft room.  I used Close to My Heart's Pro Player paper, A Thing Well Done stamp set, and this Atlantic Hearts sketch to make a card with an engineering theme.


I used the new thin foam tape to pop up the blue panel just enough to accommodate the bulk of the ribbon.  Then I used regular foam tape to pop up the sentiment.  Here is the inside:


Thank you for stopping by!  Now please check out some more cards at Atlantic Hearts.  Until next time, Hansi

Materials used, all Close to My Heart unless otherwise noted:
Paper:  Pro Player (retired), White Daisy and Whisper cardstock
Stamps:  A Thing Well Done (retired)
Ink:  Ruby, Outdoor Denim, Black
Embellishments:  ribbon from Outdoor Denim Mini Medley (retired), Hanger and brad (retired)

Sunday, February 15, 2015

Iris Folded Hearts


I can finally post my valentines!  You see, it has come to my attention that my darling husband reads my blog.  Of course I am flattered but this does make posting cards I have made for him somewhat problematic...

This week the ladies over at Heart 2 Heart want to see a Close to My Heart product that we love. Hmmmm.  What do I love most about CTMH?  The sparkles?  The ShinHan markers that allow me to have sparkles in many colors?  Thinking back to my introduction to CTMH, the thing that attracted me immediately was the paper.  I love all the layers of color and pattern.  I have been wanting to try iris folding, which is a cool technique where you place folded strips of paper across the back side of a cut out shape so that the design spirals into the center leaving an opening in the middle that is reminiscent of the iris of a camera lens.  Here is a link to a more detailed description and tutorial.  The heart pattern that I used can be found here.  First I made a practice card which my husband and I gave to our daughter:


I used a very old paper, Sweetheart, and this Sketch from Try Stamping on Tuesday:


I like how the plaid pattern swirled almost looks like marble.  To finish the card I used one of the zip strips from Heartstrings which is available through the end of March.  That is another cool thing about CTMH's paper:  Each background and texture paper has a ready to go border along the edge.  I rounded the corners and had a sweet CAS card that reminds me of a Picture My Life card.  Now that I had mastered an iris fold heart it was time for the main project, my husband's valentine:


For the background I selected one of my all time favorite papers, For Always.  I love the vintage look and all the texture.  Although it has been retired as a paper, it lives on in a Picture My Life card pack, so I know I have a fall back when I use up my stash.  For the iris folding I used a metallic paper that has been in my stash for so long that I don't remember where I got it.  The roses take advantage of something else I like about CTMH's paper, the white core.  After I cut the roses out of Champagne cardstock using the Artisite Cricut cartridge (F key, accent 2), I exposed the white core by using a file to remove the color from the edges of the petals.  Then I sponged some Blush ink along the inside edge of the spiral before rolling it up using one of my favorite tools, the quilling tool.  Before I got it I used to roll flowers using a knitting needle which did not roll nearly as smoothly.


If I had been making a flower using a dark color and wanted to edge the petals in another color I could have sanded the petals to expose the white core and colored the edge with ink like I did  here:


After stamping the sentiment I used a border punch from ek success to punch one scallop's worth of the pattern on each end and then added narrow strips of the metallic paper along the edge and tan bitty opaques in the center of each flourish.  I attached a bow, sparkle flourish (because y'all know I love sparkles), and more tan opaques in the center of each flower and was almost finished.  The completed iris folding on this card was bulkier than on the first card, so the layer would not lie flat. To solve that problem I used lots of foam tape to attach it to the card.  The layout is based on this Atlantic Hearts Sketch:


I had a lot of fun with iris folding which means you will be seeing more of it from me in the future.  In the mean time, thank you for stopping by!  Now how about visiting Heart to Heart, Atlantic Hearts and Try Stamping on Tuesday for some more inspiration?  Maybe you could even enter one or more of the challenges yourself.  I would love to see your work!  Until next time, Hansi


Saturday, January 31, 2015

Making the Old New with Heart


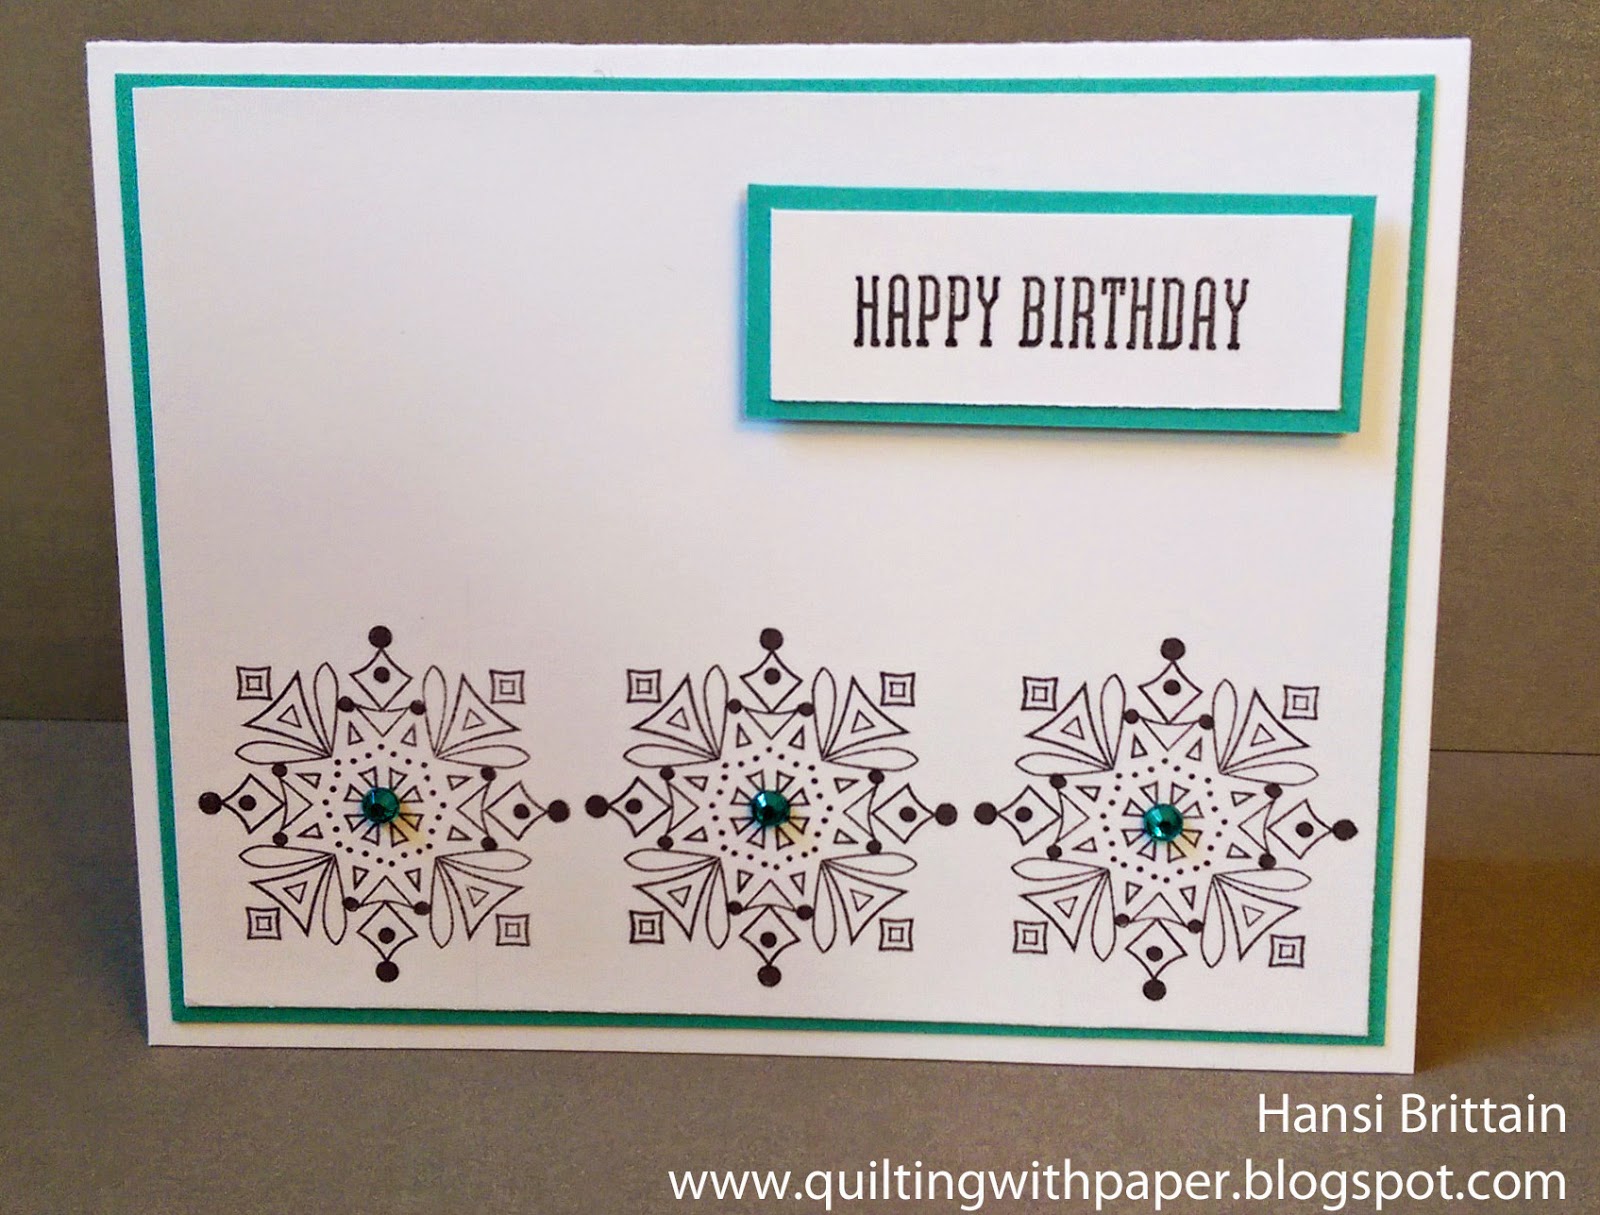
In honor of the new year, the ladies over at Heart 2 Heart want to see something old used in a new way, so I rotated the Snowflake mini from the Christmas before last to create a row of Art Deco(ish) tiles following this Atlantic Hearts sketch:


First up was with a pop of Lagoon with sparkles colored with my ShinHan marker in Peacock Teal:


Next I tried a few more pops, this time in Pixie, and upped the contrast with some black layers:


Lastly I did one in black and white:


One thing I learned is that I am much better at coloring small circles than I am tiny triangles, so I embossed the images with clear detail powder to help me stay within the lines.  This reminds me of the original bathroom in my 1930"s house.

I am also going to enter the pink card in the Seize the Birthday Anything Goes Challenge which is a new challenge blog for me.  Thank you for stopping by!  Now please head on over to Seize the BirthdayHeart 2 Heart and Atlantic Hearts for some more inspiration.  Until next time, Hansi


Sunday, January 4, 2015

A Card Inspired by a Goody Bag


This has been a rough year for my family and I had to let a lot of Christmas traditions go for now, but I made sure to hold on to the ones that connect us, including the little Christmas bag of treats that I make for neighbors.  As I was putting the bags together I found myself thinking the design would make a nice card. 


When I saw that this week the Color My Heart Color Dare is to use Glacier, White Daisy, and Kraft with the addition of black if desired it was a clear signal to adapt the design to a card using this Atlantic Hearts Sketch:


In a bit of serendipity, The Curtain Call challenge is to make a project inspired by this "Winter Wonder" themed picture:


In addition the Frosted Designs challenge theme is "White as a Snowflake."  Wow!  I could meet four challenges with one card.

Now all I had to do was make the card. First I cut and embossed the snowflake using a Spellbinders Shapeabilities die cut set, Create-a-Flake Five, with my Cuddlebug.  The sandwich to cut is A plate, C plate, die cut with cutting ridges up, cardstock, B plate.  To emboss, leave the cut shape in the die cut and make a sandwich with A plate, die cut with cutting ridges up, tan embossing mat, two pieces of cardstock, two B plates.  Next I used a Spellbinders Netabilities set to cut the hexagon and sponged around the edges with White Daisy pigment ink.  I stamped the background with the White Daisy ink and a stamp from Winter Wonderland (retired) and embellished it with sparkles that I had colored using a Cerulean Blue Light ShinHan marker.  The hexagon is popped up with foam tape.

So there you have it:  one card, four challenges, and a head start on next year's Christmas cards.  Thank you for stopping by!  Now why don't you go check out some of the other enteries in these challenges to be inspired or maybe even enter one yourself.  I would love to see your work!  Until next time, Hansi

Materials used, all Close to My heart unless otherwise noted:
Paper:  White Daisy, Glacier and Kraft cardstock
Ink:  White Daisy pigment ink, Cerulean Blue Light ShinHan marker
Stamps:  Winter Wonderland (retired)
Embellishments:  Bitty Sparkles, Hemp from Michael's
Other:  Create-a-Flake Five Shapeabilities and Nestabilities Hexagon die cuts by Spellbinders

Seaside Goes Steampunk


I was really hoping I could get this card in the mail before I had to post this to make the deadline to enter this Atlantic Hearts Sketch Challenge:


Alas, it has been an insane week, and I am lucky I even got it finished on time, so the recipient is going to see it before she gets it.  Oh well.  This sketch screamed for Close to My Heart's "A Thing Well Done" stamp set which is available as a hostess reward in the new Seasonal Expressions catalog.  As I looked through my paper I was amused that the paper that spoke to me has a beach theme.  I used the new ShinHan markers to color the butterfly and some Bitty Sparkles to coordinate.  I have found that if you stamp your image and let it set 15 minutes or so, and if you color along the lines rather than across the lines, the image does not smear.  The panel is popped up with foam tape.

Wouldn't you know it?  After I linked my card I saw that Arlene Bonsma used the same stamp set to create a lovely card.  Go check out her take on the sketch with this stamp.   Can we say great minds think alike?  Thank you for stopping by!  Until next time, Hansi

Materials used, all Close to My Heart unless otherwise noted:
Paper:  Seaside, Desert Sand, Lagoon and Colonial White cardstock
Ink:  Desert Sand and Cocoa with Light Orange, Turquoise Blue and Pastel Peach ShinHan markers
Stamp:  A Thing Well Done
Embellishments:  Bitty Sparkles

Sunday, December 21, 2014

Penguins With Heart


I was on facebook the other day and saw a link to an article about Christmas volunteering "beyond the soup kitchen".  Because I volunteer year round in a food pantry which also gets a flood of volunteers this time of year and I rank food pantries along with soup kitchens, I was curious about the alternative suggestions.  The last thing I wanted or needed was another volunteer activity.  Along with my regular activities and my usual Christmas activities, my church was hosting homeless folks as part of a rotating program.  But there it was.  Several group homes for individuals with intellectual disabilities were requesting handmade cards to distribute to residents to brighten their holidays.  I don't think I have mentioned this before, but my daughter will be moving into such a home in a few years.  Soooo, I used an old Close to My Heart hostess stamp, Winter Wishes, and this Atlantic Hearts sketch to make ten cards.


Here are my favorites:


I used an assortment of materials and am crunched for time (aren't we all), so I am not going to describe everything I did and used, but if you have questions about anything you see, please leave a comment and I will answer.  Now which one to enter?

This is my last post before Christmas, so let me wish y'all Merry Christmas or Happy whichever holiday you celebrate.  Thank you for stopping by!  Until next time, Hansi

Sunday, December 14, 2014

A Tinsel Town Challenge


The last Heart 2 Heart challenge of the year is to use Silver, Black and Lagoon in a project.  At the risk of showing my age, I got to thinking about the artificial trees of my childhood which were aluminum. (Just in case you have ever wondered why Linus knocks on a tree and hears a hollow metal sound when he and Charlie Brown go Christmas tree shopping in "A Charlie Brown Christmas")  I knew that I wanted to use this tree from the Holiday Wishes stamp set and that this sketch from Atlantic Hearts was the perfect one to show it off.


First I cut Shape8 using Close to My Heart's Art Philosophy Cricut cartridge and embossed the tree using Ranger's Super Fine Silver embossing powder.  To embellish the tree I used a ShinHan Peacock Green marker to color some Clear sparkles and, because I did not have enough Black Bitty sparkles, I used a Black marker to color some Clear ones.  How did I get that black border so narrow?  Did I use the Cricut Design Space?  Sadly, no because I do not have a Cricut Explore (yet).  I hope to get one for Christmas as it is at the top of my wishlist and DH is a pretty smart man...  In the meantime, on my Expression the default is to cut in .25 inch increments, but if you go into settings, you have the options of .10 inches, centimeter, and millimeter increments.  I changed my setting to .10 inches and cut a shape in black which was .10 inch bigger.  I had intended on cutting an additional layer using Silver Glitter paper, but I found I liked it with just the black border against the Lagoon background.  Because I did not need to allow room for extra layers, I made a second card with the shape8 cut larger enough to include a sentiment from the same stamp set stamped with black pigment ink and embossed with clear detail powder.


I am not sure which card I like best.  What do y'all think?  Thank you for stopping by!  Until next time, Hansi

Sunday, December 7, 2014

A Snowflake For Atlantic Hearts


This really cool snowflake by Tim Holtz caught my eye in Hobby Lobby.  It is a die cut that is not particularly interesting until you use the accompaining folder to emboss the cut shape.  Then if you play with ink, a brayer and sponges you can really have some fun.  Now this is a Sizzix product which, according to the package, is compatible with four different machines which all happen to be made by (surprise!) Sissix, but we all know that if you experiment you can make anyone's product work in a Cuddlebug.  The sandwich for the cut is B plate, die cut with foam side up, paper, and another B plate.  To emboss, you can use the regular sandwich (A plate, B plate, folder with paper in it, and B plate) and get a respectable impression, but I found that I got a sharper impression when I added a piece of cardstock between the embossing folder and the upper B plate.  I used a brayer to spread some silver metallic ink from Color Box over the impressions and a sponge dauber to put just a hint of silver on the edge tips.  Now I was ready to make a card using this sketch from Atlantic Hearts:


I really liked how the snowflake looked against the Frosted paper, so I cut an accent shape from it using my Cricut and the Art Philosophy cartridge and then cut a second larger shape in Frosted Gray to create a layer.  When I laid everything out, I found that the shape overwhelmed the snowflake, so I decided to make the snowflake my accent shape.  I stamped the sentiment in Silver and then gilded the edges of the Colonial White pieces by pushing the edges into the stamp pad.  I was going to put a few sparkles to the upper right of the snowflake, but again it seemed to detract, so I settled for one light gray sparkle in the center of the snowflake.  This is a 5 x 6.5 inch card, but I am thinking this would work well as a horizontal card in the A2 size.

Thank you for stopping by!  Until next time, Hansi

Materials used, all Close to My Heart unless otherwise noted:
Paper:  Frosted (retired), Colonial White and Frosted Gray (retired)
Ink:  Silver by Color Box
Stamp:  Snow Flurries (retired)
Embellishments:  Black and Gray Sparkles Assortment
Other:  Snowflake Die Cut and Embossing folder by Tim Holtz

Sunday, November 30, 2014

Celebrating NOvember with Heart 2 Heart


This month the ladies over at Heart 2 Heart Challenges are celebrating NOvember with each challenge involving some sort of no, that is something you are not allowed to use or do.  I have added my own theme of sNOwflakes.  Don't get me wrong.  I love snowflakes as a design element, but the real thing is another matter.  I like snow if we get enough to shut everything down for a day or two, say eight to 10 inches, and then melt quickly.  You Yankees and Canadians can stop laughing.  Unfortunately we are more likely to get two or three inches which is only enough to make the roads a mess and you are still expected to go to work, but schools will be closed, so you need to make alternate arrangements.  Really, y'all can stop laughing now.  The thing is, here in Richmond, Virginia you never know which it is going to be.  We have had "slight accumulation" forecasts turn out to be 16 inches which is why we always go to the grocery store to stock up anytime the slightest possibility of frozen stuff is called for.  To tell you the truth, we Richmonders like to enjoy our snows (as long as we have plenty of bread, milk, eggs and toilet paper) which is why we close down or find that we just can't make it into work.  Seriously, I don't think my little one way street has ever seen a snowplow.  Yes, I do love snowflakes as a design element, so here we go.

First up is the NO stamps challenge:


That was easy enough.  I have a Cricut and Cuddlebug.  As I have mentioned before, I love the elegance of Close to My Heart's Yuletide Carole paper, particularly when paired with metallic paper and/or ink.  It doesn't show in the photo, but the gold paper and distressing around the edges of the black paper is metallic.  To get a nicely gilded edge, I first heavily sponged around the edges and then, holding the paper straight up, pushed each edge into the soft stamp pad.  I lightly sponged the edges of the snowflake and patterned panel with black.  This card is based on the Atlantic Hearts Sketch:


The next Heart 2 Heart challenge was NO ink.


Hmmm.  This was a little more interesting because I like to use ink to define edges, create dimension, etc. and, of course no ink rules out stamping unless you don't consider Versamark to be an ink, which I do.  I was inspired by this card I saw on Pinterest.  The image is no longer on the blog page, but you can see it on my pin.  The use of texture and the clean look of white and a neutral attracted me.  Thanks to my Cricut and Cuddlebug, I could get by without ink.

For the next challenge the rule was NO embellishments.  


No embellishments?!  There is a reason why they call them challenges, because this one was definitely a challenge for me.  I assumed that embossing also counted as an embellishment.  And how can I do without sparkles?  I did use a little bit of glitter paper in the center of the snowflake before attaching it with foam tape for some dimension.  I used this Freshly Made Sketch but put the ribbon element, in this case a punched border, on the bottom because it fit my design better.


The last challenge had NO rules


Great!  I could just make a card! After punching the snowflake border and sponging gold metallic ink all around the panel, I sponged the very edge of a strip of gold and put it behind the openings.  The ornament is edged with a bit of black ink and popped up with foam tape.   I used this Freshly Made Sketch as my inspiration:


There you have it, just under the wire, four sNOflakes for Heart 2 Heart's NOvember challenges.  Thank you for stopping by!  Until next time, Hansi

Materials used, all Close to My Heart unless otherwise noted:

No Stamps Challenge:
Paper:  Yuletide Carol, Black and Colonial White cardstock with gold metallic cardstock from Michael's
Stamps:  none
Ink:  Black (edges of snowflake and patterned paper), Gold Metallic ink by Color Box (edges of black paper)
Embellishments:  Yuletide Carol assortment, Tan and Pearl opaques (retired), Black ribbon from I don't remember here
Other:  Art Philosophy Cricut cartridge, Holiday die cuts by Spellbinders

No Ink Challenge:
Paper:  Colonial White cardstock with Gold Metallic cardstock from Michael's
Ink:  none
Stamps:  none
Embellishments:  Pearl opaques (retired), Colonial White satin edged organdy ribbon (retired)
Other:  Art Philosophy and Artbooking Cricut cartrigdes, Stripes and Quatrefoil embossing folders

No Embellishments Challenge:
Paper:  Yuletide Carol, Colonial White, Champagne and Black cardstock with Bronze Metallic cardstock from Michael's, black glitter paper
Ink:  Black (stamp and edges of patterned paper)
Stamp:  Very Merry Christmas (retired Stamp of the Month)
Embellishments:  none
Other:  Art Philosophy Cricut cartridge, Snowflake punch by Martha Stewart, Snowflake border punch by ek Success

No Rules Challenge:
Paper:  Yuletide Carol, Black cardstock, Gold Metallic cardstock from Michael's
Ink:  Black (edges of Gold cardstock and patterned paper), Gold Metallic ink by Color Box (edges of Black cardstock)
Embellishments:  Black sparkles, Tan opaque (retired), Black ribbon from I don't remember where

Sunday, November 23, 2014

Gold Trees for Atlantic Hearts


Here are three Christmas cards using this Atlantic Hearts Sketch:


When the new Close to My Heart Annual Inspirations came out, I was thrilled to see that they now offer Gold, Silver, White and Clear Detail embossing powders.  Y'all know how much I love to emboss!  The tree comes from a Thanksgiving stamp set, Always Grateful, and the flourish from an old Halloween Stamp of the Month, Wicked.  Who says you have to limit your use of a stamp to the holiday for which it was intended?

This year's Christmas paper, Yuletide Carol, is so elegant!  Here paired it with gold metallic paper from Michael's:


Yes, I like glitter paper, but sometimes I want the soft sheen and quiet elegance of a metallic.  To complement the gold paper I gilded the edges of the black panel with gold metallic ink from Color Box.  I also lightly sponged the very edge of the printed panel with black.  I find that when you have an open dark pattern printed on a light background, sponging the edge gives it some definition against the layer below it.  It is subtle, but if you try with and without sponging you will notice a difference.

Next I used Pear and Partridge, a Christmas paper from a few years back, along with the gold paper:


I used a Sap Green ShinHan marker to color some bitty sparkles to embellish the zip strip.  Thanks to the new markers I can have sparkles in many colors!

Lastly I went back to Yuletide Carol, selecting a more traditional paper and colors:


Again, I gilded the edges of the green and patterned panels with gold metallic ink and, for good measure, backed to green panel with gold metallic paper to provide a very narrow border  before layering it onto the Colonial White.  I embellished it by wrapping some black glitter Seweasy fancy floss by We R Memory Keepers around the center panel and adding a bit of black ribbon I got somewhere.  I don't remember where.  I should also mention that I popped up the Christmas tree panels with foam tape.  

There you have three takes on Atlantic Hearts Sketch #82.  I like the first version best, but the last one follows the sketch more closely, so that is the one I plan to enter.  Why don't you go over and see what others have done with this sketch?  Thank you for stopping by!  Until next time, Hansi

Materials used, all Close to My Heart unless otherwise noted:
Paper:  Yuletide Carol, Pear and Partridge (retired), Black, Emerald Green and Colonial White cardstock, Gold metallic paper from Michael's
Ink:  Gold Metallic ink by Color Box, Sap Green ShinHan marker
Stamps:  Always Grateful, Wicked (retired)
Embellishments:  Clear Bitty Sparkles, Gold embossing powder, Seweasy fancy floss by We R Memory Keepers, Black ribbon of unknown origin